Inboard Kayak motor

drive setup

drive setup

As i was getting into sea kayaking and fishing, and how i always live things with motors in them.  I thought i would be a cool idea to have a motorized kayak.

What i figured i wanted was an inbuilt design, just so it was tidier and didn’t cut anyone up with spinning parts. I wanted it to be electric start so there was less risk of capsizing just trying to reach around and pull start it. And it wanted it to be as small as possible. Also cheap. Like no money. So really just from stuff i already had lying around.

As the motor would be inside a water vessel, it seemed logical to have it water cooled. And because i didn’t have the money for an actual outboard motor, I just used what i had. A weed-eater motor. 30 ish cubic centermeters of raw power 😛

The problem was weed-eaters are air cooled. to solve this i figured i could make a fiberglass water jacket and since the motor wouldn’t get above 150°C, the resin should hold up fine. For a cold water supply, i was just going to use water from the pump unit. Like how Jet-skis do.

This was my first experience fiberglass molding and coating, so it was pretty rough. The molds didn’t release as i intended and there were many second attempts, patch jobs and fixes. But it was fun and a good learning experience.

Once again this project was never put into use. This time because i didn’t actually end up getting another kayak to put it into. should have really been the first step to get another kayak but where is the fun in that :P. So for the rest of its life it sat on a shelf in the garage, unused, until the house burnt down and it became a puddle.

Direct Injected 2-Stroke Lawnmower motor

Motor Overview

Motor Overview

I’ve always wanted to make a engine control unit (ECU). So when the i came into possession of a old 2 stroke lawn mower motor, i took the opportunity to play around with electronic engine management and direct fuel injection.

After checking the motor ran, i pulled it apart to work on the modifications. Basically i took a fuel system out of a car, attached it to the side side of the motor and put the injector in the cylinder head. I know this wouldn’t last long term. But i was just wanting to play around and see if i could 😛

IMGP8738

This setup was pretty basic and had the carburetor only controlling the air flow while a sensor measured the air flow setting. A sensor on the crankshaft that determined the point in the intake stroke the exhaust port closed i.e. when to inject the fuel. A basic 12v driver circuit to run the injector. And finally the Arduino Micro-controller, the brains of the operation. Its job was to calculate the time the injector should be open, based on the air flow valve sensor. Then to activate the injector for the pre-calculated amount of time when the crankshaft sensor is activated. The ignition i kept standard as i didn’t want to take on too much at once and have too many variables.

In the end i never did get it to run. The most i got it to do was shoot fireballs out the exhaust, which I think was from injecting way too much and too late.

Looking back i think it could have actually been pretty close to running with just advancing crank sensor position and reducing the injector on-time a bunch. Also an exhaust with some decent back pressure would have also helped with pre-charge pressure.

Possible changes for future iterations:

  • Have an actual Fuel map and ideally a O2 sensor
  • A better, faster Injector driver circuit
  • More precise injector timing for better fuel control

Year: ~2009/2010

injector in top of milled cylinder

injector in top of milled cylinder

Cylinder with Injector installed

Cylinder with Injector installed

Potato Cannon!

It seems 2004 – 2005 was a a busy year for me. I also started to make a Auto-loading potato/tennis ball cannon.

I already had a manually loading one which could shoot a tennis ball 100+ meters or so. But i wanted to one up it. and in comes the idea of a auto-loading, auto- priming cannon. Now the reason i was using tennis balls was; A, they were a uniform shape; B, the fuzz on the ball enabled it to have a perfectly snug fin in the bore of some PVC Tubing i had. Not too tight that it wouldn’t fire out and/or explode the combustion chamber in my face. Not too loose that it would fall out or into the combustion chamber. In other words “a perfect eggie” (sorry, inside joke, my mates will get it tho).

Probably the best, most fun part of this project was that it involved a bit of automation. Figuring out a logical sequence then the way to do it involving mechanical and electrical methods is that i find challenging and fun. Even if its just a motor, gas supply, and valve, all with a couple of relays which latched or disconnected based on micro-switches. A pretty dumb setup really but that was all it needed and it worked, for the most part anyway. The Gas Supply was on the side of the chamber with a regulator and 12v solenoid gas valve to turn it on and off.

The project got pretty far, to the point where i could load balls at the push of a button and i was testing the combustion mixture. But the mixture tuning became too hard and it needed forced aspiration to stop it melting itself. So after it melted the sealing taper of the chamber i gave up.

Cannon rearCannon gas setup side on

check out the video of what it did below:

Tesla coil

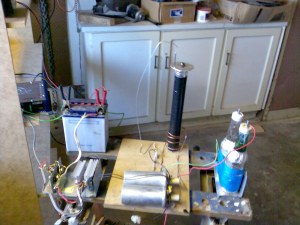
basic setup of auto-transformers, salt water capacitors, driver transistors  and a battery power source.
Basic end setup of auto-transformers, salt water capacitors, driver transistors and a battery power source.

HIGH VOLTAGE SPARKING!!! The thing of boys dreams.

This was one of the early electronics projects i did, so be kind. As crude as it was, it actually and surprisingly worked OK. Even with significant losses in the salt water capacitors (bottles wrapped in tinfoil on the right) it was still able to arc a gap of 15mm or so in air and shock the fuck out of you. For 15 year old me that was a win.

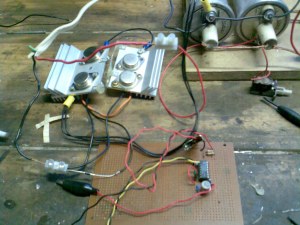
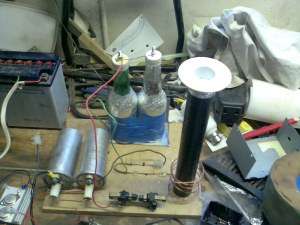
The setup is pretty standard with car ignition coils, spark gap, home made salt water capacitors an wound secondary transformer (black tube that makes the sparks), apart form the transistor drivers. I originally made a little 555 timer circuit that produced the signal to control the transistors but i quickly fried it, so i improvised…. In the top left of the picture is an old car sub-woofer amp which i used to drive the transistors. I then had either a laptop or mp3 player (cant remember now) hooked up to the amp producing the correct wave to get he system to run. I would NOT recommend doing this now though. Just a bad idea that somehow worked.

555 timer and driver transistors
coils, spark gap, salt water capacitors and output transformer
Battery, coils, spark gap, salt water capacitors and output transformer
Tesla Coil light Bulb

One cool thing i did with it was connecting a large incandescent light bulb to the top of the output. Turned off the lights. And turned on the Tesla coil. It was pretty much a poor mans Plasma Globe. But just for bit of added fun, it would shock you a little bit when you touched it 😛

Another cool thing about it was if you held fluorescent bulbs near it, they would light up.

Year: ~2005

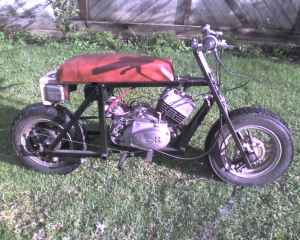
The fugly mini bike… thing

~2004-2005

Fugly mini bike. Year ~2004-2005

This one me and a friend made from scratch. We had the engine (Kawasaki, 90cc, disk valve) left over from an old Go-kart we made and destroyed the previous summer, so thought we better put it to good use.

It was a pretty crude make. Scooter wheels and breaks. Lawn mower gas tank on the rear to keep out of the front forks. Custom hand made seat. But it was fun to make, it did go and it was some good thin wall welding practice for us. Just when you already have a 200cc off road motorbike, the fun of riding this quickly wore off.

Year: ~2004

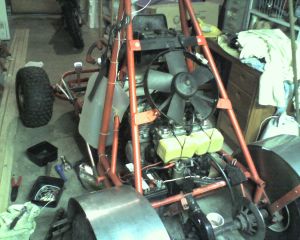
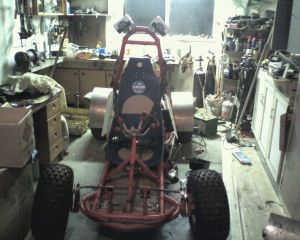
Go-kart with 550cc engine

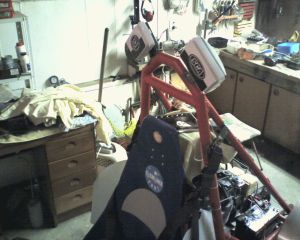
No me and my friends didn’t make this from scratch. We inherited it in a basic state from a mates paddock, where it had been sitting for a couple of years. We just had to clean out the engine, add a fuel, electrical and air systems, weld up the frame a bit, tyres and the addition of the all important rear mudguards. No one likes being covered in cowpats.

But after all that “prep” it went pretty hard. Well you would expect so with a  5-speed, 550cc, Yamaha, inline four strapped to the back of it. After a good season of running it was sized and demoted from the garage back into a paddock.

Year: ~2005 – 2006

Big automotive fan added to try relieve the suffocating air cooled engine

Big automotive fan added to try relieve the suffocating air cooled engine

Go-Kart

You can see the camber of the front wheels. Not intended of course. Just bent that way because of poor design 😛

Because you know, when your 17 driving at high speeds at night is always a must.

Because you know, when your 15/16 driving at high speeds at night is always a must.